Step 1 – Walls
Choose your wall height, options are 2.5m or 3m
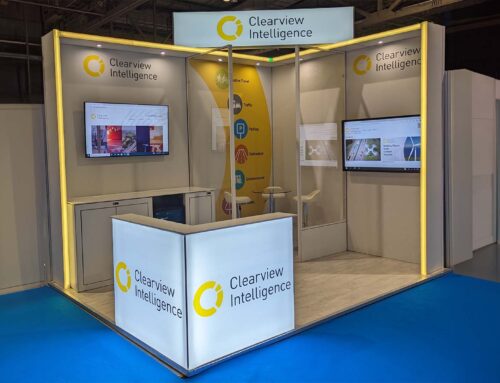
Step 2 – Features
We have lots of features you can add to your stand, Choose from:
- Arches
- Lightboxes
- High Walls to 3.5m
- Walk in storage
Step 3 – Counters, plinths and product displays
Our standard counter is 1m wide x 0.5m deep x 1m high, white melamine top with shelf and doors to back and 3 sides of printed graphics. BUT…. we can create multiple variations from this. Wider/narrower, bigger/smaller, higher/lower, add lighting, lockable. Add AV.
We can free stand or built into the walls. Add a plinth to the bottom and add LED lighting.
Step 4 – AV
Think content first, what are you showing and how you want to show it. Standard options are screens @ 32″, 43″, 50″, 65″. 4k or HD. Or add LED Tiles to make a real splash!
Step 5 – Flooring
Basics are carpet or vinyl straight to show floor. Need to run cables from the backwalls then you need a platform. Our standard offering is 40mm Eco Floor, the UK’s most popular raised platform. We then add a carpet, vinyl or artificial grass and finish the edges with aluminium trim.
We are working on offering 100mm platform and LED edging, watch this space!
Step 6 – Project
On any custom project we need to complete various tasks to deliver a successfully.
- SOW – Scope of Works
- 3d Design
- Technical Designs
- Electrical Plan
- Graphic and Panel Plans
- Approval to Build – Submission of stand plans, RAMS/CDM
- Graphic Design if not outsourced
- Production of graphics and any custom elements
- Pre-Build
- Logistics
- Installation
- Dismantle
When designing a custom modular stand you can choose various options to make the stand your own. These steps outline the main options available.

Leave A Comment